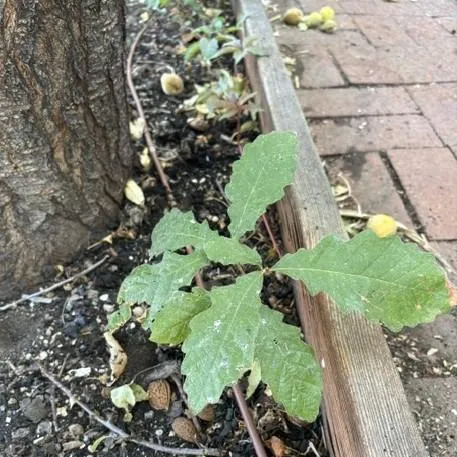
Starting Trees From Seed:
A Thorough Guide to Seed Treatment, Germination, and Caring For Those First Years
If you've ever fantasised about filling your yard with fruit trees, a lush canopy of shade, or perhaps even a living windbreak, then starting from seed is the secret every thrifty gardener should know. It takes time and careful planning, but the rewards are well worth the effort. In this guide, I'll walk you through the whole process from gathering seeds to planting out your young trees, so you can watch your very own little forest take root.
Key Takeaways
Growing trees from seed or seedling can be a little fiddly, but the benefits are enormous. Seeds are generally a lot cheaper than buying young trees, though they do require a bit more patience and sometimes a special trick or two. With the right timing and some basic know-how, you can turn a handful of seeds into a whole grove of healthy young trees.
Something to keep in mind is that if you plant a seed from your favorite apple, pear, or peach, the fruit you eventually get might not be a carbon copy of the parent. Nature has a way of mixing things up, so every seed is a bit of a genetic surprise. If you want fruit that's identical to the one you started with, you'll need to graft a cutting from that variety onto your seedling.
Many tree seeds need a bit of encouragement before they'll wake up - a spell in the cold (stratification) or a bit of rough handling (scarification) before they'll even think about sprouting. Cold stratification can last anywhere from a month to five months, depending on the species. Timing is everything: most temperate tree seeds are gathered in the fall, treated over winter, and planted out in spring. Once they're up and going, a bit of TLC - good light, consistent moisture, and protection from frost and any pesky critters - will help your seedlings grow into sturdy young trees in a year or two.
Why Start Trees From Seed Rather Than Buying a Tree?
One potted apple tree from the nursery can cost you $40 or more, but a ripe apple from your lunch can give you five to ten seeds to plant for free. And as for acorns? You can gather a pocketful for nothing but a wander in the park. Growing trees from seed isn't just about saving money, either - if you think about what you want your trees to do, you might find that starting from seed is actually the clever choice.
If you're planning big - maybe a windbreak, a hedgerow, or even your own mini-orchard - then seeds are hands-down the most budget-friendly way to go. While buying seedlings gives you a head start and a better survival rate, seeds let you grow hundreds of trees for the price of a packet (or for free, if you collect your own).
Seed-grown trees are nature's way of mixing things up. Each one is a little different, which helps them adapt to your local soil, pests, and weather. If you pick tree species that already do well in your area, your homegrown seedlings can often outshine their nursery cousins, especially when things get tough.
Watching a seed come to life and send out its first root is one of the most magical things in gardening - whether you're a curious gardener or a classroom full of kids. Growing trees from seed lets you see every stage up close.
Just a heads up: most fruit trees grown from seed can take five to ten years (sometimes more) before they bear fruit, and what you get may be a surprise. If you're after a sure thing and don't want to wait, grafted nursery trees are still your best bet. But if you're patient and enjoy a bit of a challenge, seed-grown trees can be very rewarding.
Understanding Tree Seeds and the Germination Process
Germination is just a fancy word for when a seed wakes up and starts growing. All it needs is water, air, and the right temperature. Unlike lettuce or corn, which pop up in days, most tree seeds take their time - sometimes weeks or even months - waiting for just the right signal to get going.
It all starts when the seed absorbs water, which wakes up the enzymes inside. The first thing to appear is the root (called the radicle), which anchors the seedling. Next comes the shoot, pushing up until those first real leaves open and the plant can start making its own food from sunlight.
Many trees from temperate climates - like oaks, maples and apples - have clever ways of making sure their seeds don't sprout at the wrong time. They need a cold and damp spell before they'll even think about growing. Without that, they can just sit in the soil, sleeping, for a year or more.* Not all seeds follow the same rules. Some, like oaks and chestnuts, are real divas, demanding constant moisture from the moment they're collected and won't tolerate drying out at all. You've got to keep them moist from start to finish. Others, like most conifers and temperate fruit trees, are much more easy-going and can be dried and stored for years as long as it stays cool.
How long does it take for seeds to sprout? Well, that depends on the seed. Some are off and running in just a few weeks, after you give them the right treatment. Others, particularly nuts and hardwoods, might take months, or even need to spend a whole winter chillin' out before they decide to grow.
Collecting, Cleaning and Storing Tree Seeds
The secret to getting a healthy crop of seedlings starts in the fall. Collect seeds from healthy, local trees - these are already adapted to your local climate and are more likely to thrive. Look for the best specimens you can find.
Timing really is everything. Wait until those seeds are fully ripe before collecting them—usually late summer to late autumn. Acorns are usually ready in September or October, while apples and pears come into their own from September to November, depending where you live. One good sign is when the fruit comes off the branch with just a gentle tug.
How do you know if seeds are ready for the picking? Look for changes in the fruit or husk - sometimes they change color, the shells get firmer on nuts, and when you cut one open, the seed inside is plump and nice. Maple seeds should be brown and dry, and walnut husks should be turning dark and soft.
To clean your seeds, you basically just mash the fruit (like apples, pears, or cherries) in water and rinse them off - any leftover sugars can attract mold. Then spread the cleaned seeds out on paper towels and let them dry for a day or two, but don't let the fussy types (like oaks and chestnuts) dry out completely.
For seeds that can be stored (the easy-going types), keep them dry and cool. Pop them in labeled paper envelopes, then into a sealed jar in the fridge at about 1 to 5 degrees Celsius (34 to 41 Fahrenheit). Seeds don't do too well if stored badly, so always label them with the species, where you got them, and the date.
For seeds that hate drying out (like oaks and chestnuts), keep them cool and just damp—never let them dry completely. Store them in a breathable container with a bit of moist sand or peat in the fridge, and plant them as soon as possible.
Seed Treatment Methods to Improve Germination
Seed treatment is a fancy way of saying you're giving seeds a boost to help them wake up and grow. In the wild, winter cold, freezing and thawing, or even a trip through an animal's belly can do the trick. At home, you can mimic these cues on your own schedule. For most temperate trees, a bit of cold and moisture is the magic ticket - get it right, and you'll have a tray full of seedlings instead of a tray full of disappointment.
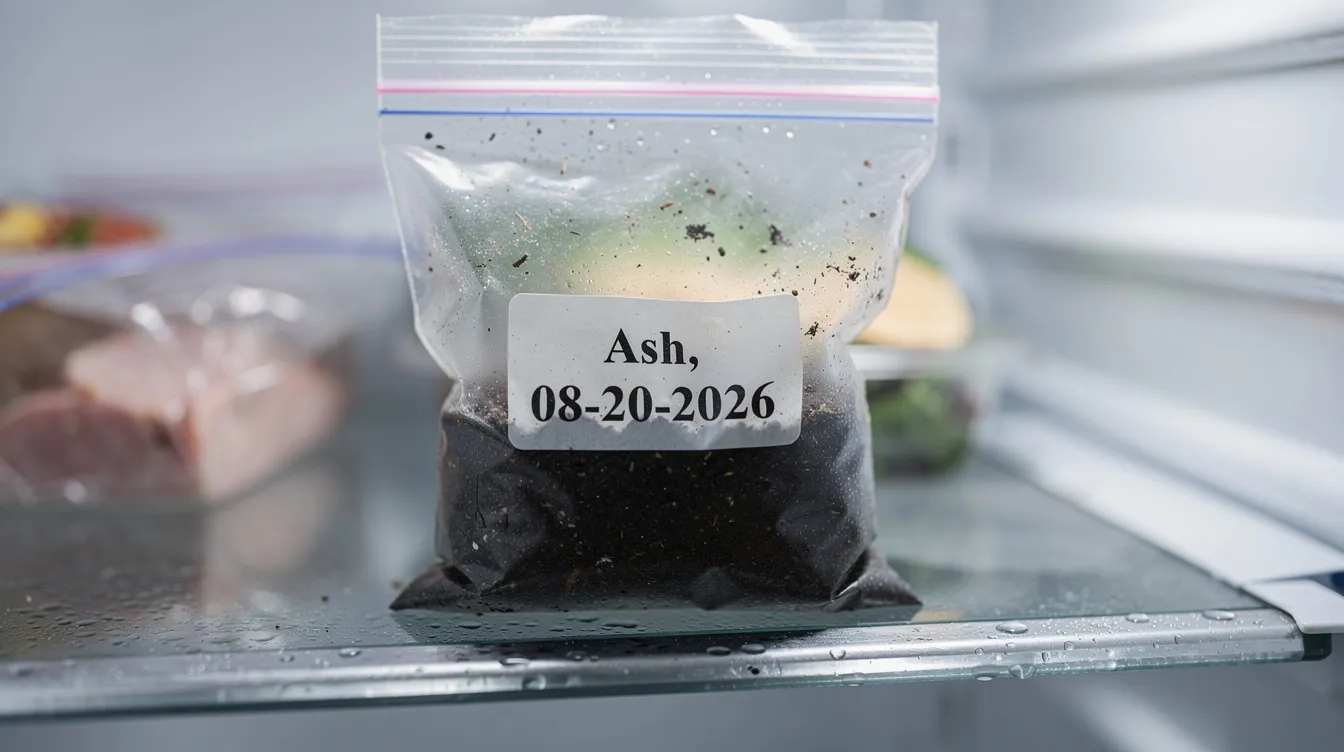
For cold moist stratification, tuck your seeds into a bit of damp mix of sand, peat-free compost or vermiculite, seal it in a labeled plastic bag and bung it in the fridge at 1 to 5 degrees Celsius (34 to 41 Fahrenheit) for anything from 4 to 16 weeks, depending on the species. Apple seeds usually need 8 to 12 weeks, while green ash can take up to 90 days.
Some seeds, like certain cherries and hawthorns, want a warm, moist spell (about 15 to 20 degrees Celsius, or 59 to 68 degrees Fahrenheit) for a few weeks before they get their cold treatment. This mimics the change from summer to winter and helps the seed prepare to grow.
For seeds with tough shells—like black locust, honey locust, and some shrubs—you'll have to give them a bit of help. Gently nick the coat with a file or some sandpaper, or carefully crack them so water can get in. If you don't, the seed might just sit there and do nothing.
For some seeds, like apples and pears, soaking them in room-temperature water for 12 to 24 hours before stratification or planting can give them a boost. This can even shorten the time it takes for them to sprout.
If you have a batch of precious seeds and want to be extra careful, you can dust them lightly with a broad-spectrum biological fungicide. Follow the label instructions, and make sure there's good airflow when you check on your seeds.
Special Focus: Starting Fruit Trees From Seed
Starting fruit trees from seed is a bit more involved than starting veggies from seeds, but it can be really rewarding. It's not the only way to grow a fruit tree, but it's worth a try if you're up for a challenge.Lots of people are curious about growing apples, pears, peaches, plums, & cherries from seed. The good news is that it's not all that complicated once you know the tricks for each type - but you gotta set your expectations straight about how long it'll take & what kind of fruit you can expect to get.
Apples - 1st step: grab some seeds from a ripe variety like 'Gala' or 'Fuji', soak them in water for a day, then plop them into a damp pot of vermiculite in the fridge & stick with it for 8 to 12 weeks. Start the seedlings indoors in late winter - they'll be ready to move outside after the last frost in spring.
Stone fruits like peaches, plums, & cherries - the lowdown: take those pits from ripe fruit & clean off any flesh you can. You might need to crack the outer shell to help things along. For peaches, you'll want to give 'em a warm, moist spell for 2-4 weeks, followed by a cold one for 4 to 9 weeks. Cherries & plums tend to need 10 to 16 weeks of cold.
Citrus seeds - piece of cake: they'll sprout just fine indoors any time of year - no need to worry about a cold spell. Just give 'em some warm & bright light, & they'll be happy. Be aware though, that citrus seeds take ages to fruit - & in cooler climates, you might end up with a lovely houseplant instead of a harvest.
Seedlings from fruit trees make great grafting stock - once the stems have thickened up a bit (usually after a year or two), you can graft your favorite variety onto them. That way you get the best of both worlds: a tree that's adapted to your local soil & climate, and fruit you can actually count on.
Patience is a virtue. Most fruit trees grown from seed will take 5 to 10 years (or more) to start bearing fruit, while grafted nursery trees can do it in just 2 to 4 years. But if you're willing to wait & experiment, you might just end up with something special.
Why Fruit Trees From Seed Rarely Match the Parent Tree
Most modern fruit trees are super complex & are made by cross-pollinating one tree with pollen from another. Every spring, insects like honeybees move pollen between different varieties & each resulting seed gets a unique genetic mix. That's why planting an apple seed from a 'Honeycrisp' won't give you another 'Honeycrisp'.
The genetics: each seed is like a genetic mix of its parents. A bit like how kids in a family share the same parents but all look & act differently.
How apples get made: honeybees move pollen between different apple or pear trees all over the world - so it's super unlikely any seed will be a genetic clone of its mum.
The origins of famous apples: 'Honeycrisp' & 'Granny Smith' started out as happy accidents - seedlings that were different from their parents in some way. These kinds of seeds are the exception rather than the rule.
What you can expect: fruit from seedlings can be smaller, more tart, irregularly shaped or ripen at weird times compared to the parent. But occasionally, they're a hidden gem - which is how new varieties get discovered.
Grafting: nursery fruit trees are made by grafting a cutting (a clone) of the desired variety onto a separate rootstock. Because the scion is a perfect genetic match to the parent, its fruit is predictable & true to type.
Indoor vs. Outdoor Sowing: Choosing Your Method
You've got two main choices: let nature take its course outdoors, or control the process indoors. Each method has its pros & cons & your climate & species will usually decide which one works best.
The outdoor method: sow seeds in autumn in a prepared bed or pot placed outside. Winter cold will do the stratification for you. It's a low-cost option that works well for big seeds, but there are risks - like rodents, birds, waterlogging & uneven germination. One experiment found that fall outdoor sowing got a whopping 90% germination rate - way higher than indoor-only stratification.
The indoor method: stratify seeds in a sealed bag in the fridge & then sow indoors in small pots in late winter (February to March in temperate climates). Use grow lights or a bright windowsill & a seedling mat to keep it warm. Plant the seeds in a sterile mix to stop fungal diseases. The rule of thumb is to plant a seed at a depth equal to 2 to 3 times its diameter - just below the soil surface.
Climate considerations: if your winters are mild & don't get much frost, the fridge method is way more reliable than relying on outdoor temps to stay cool. This way, you get precise control over the cold period.* Species choice. When it comes to large seeds like walnuts, chestnuts, or acorns, it's often best to sow them outdoors in deep containers. These seeds need room to grow some pretty vigorous roots. On the other hand, finer seeds like apple pips or maple samaras can be managed a lot more easily indoors in trays or plugs.
For example, a batch of oak acorns sown in an outdoor container in October will get through the winter and germinate in spring with barely any effort. Meanwhile, apple seeds started in trays indoors under grow lights in February can be hardened off and transplanted outside by May.
Caring for Young Plants: From Seedling to Bare Root Tree
The first one to three years are critical in determining whether your seedlings grow into sturdy bare root trees that are ready to be planted out. Proper aftercare is key - so water them deeply and consistently during the first growing season, rather than keeping the potting soil perpetually wet.
Light. For indoor seedlings, provide bright indirect light, but don't put them in direct sunlight straight away, because that can scorch the tender leaves. Gradually increase the amount of time they spend outside over a week or two before leaving them out full-time in the spring.
Water. Keep the potting medium moist, but make sure it drains well. Overwatering will cause root rot; underwatering will stunt their growth. Water them deeply once or twice a week during the first growing season to help their roots grow and develop.
Nutrition. Once they've got true leaves, start giving them a light, balanced liquid fertilizer at half strength every two weeks. Don't overdo it - heavy feeding can lead to soft, leggy growth that's vulnerable to disease, pests and cold damage. Just let them take up nutrients at their own pace.
Potting on. Move them into bigger pots when the roots start circling, or when they reach about 10 to 15 cm (4 to 6 inches) tall. Container trees can get roots that need untangling when you move them to a bigger pot. Try to transplant them when they reach about 40 to 50 cm tall for the best chance of success outside.
Root development. A bare-root tree is a dormant tree with all the soil removed from the roots. Bare root trees are lighter and cheaper than container trees, and they transplant really well. After one or two growing seasons, many seedlings can be lifted during dormancy and moved into nursery beds or planted where they'll stay for good.
Transplanting and Planting Out Young Trees
The best time to move young trees to their permanent site is in late autumn after the leaves drop, or in early spring before bud break, when trees are dormant. Plant bare-root seedlings in early spring or late winter when they're still dormant. For best results, plant trees in late winter or early spring. Before you start digging, make sure you have a spot with the right amount of sunlight, good soil drainage, and enough space for the mature canopy and root system.
Site selection. Pick a spot that's got the right amount of sunlight, good soil drainage, and room for the tree to grow. Consider how exposed it will be to wind and whether it's too close to any buildings.
Handling bare root trees. Keep the roots of bare-root seedlings moist and shaded before planting. If planting is delayed, try hilling them up in damp soil or wrapping the roots in wet burlap to stop them from drying out.
Planting depth. Plant trees at the same depth they were previously growing, with the root collar just below the surface. Planting them too deep can suffocate the roots and weaken the tree over time.
Digging, backfilling, and watering. When planting, dig a hole that's two to three times wider than the root ball. Spread the roots out over a small mound of soil at the bottom, backfill carefully, and water really well to settle the soil around the roots.
Protection and mulch. Add a 2- to 3-inch layer of organic mulch around newly planted trees to help retain moisture. Mulch around the tree can help suppress weeds and conserve moisture, but don't pile it up against the trunk - keep it a few centimeters away from the stem. Use a tree guard to protect against pests and sunscald, and only stake the tree if it's in a really windy spot. Keep the area around the tree weed-free for the first few years to give it a chance to establish.
Common Problems in Starting Trees and How to Avoid Them
Starting trees can be tricky, but you can avoid most common mistakes with a bit of knowledge. Knowing what to watch out for will give you a much better chance of success.
Poor germination. Often caused by skipping stratification, using old or non-viable seed, letting the seeds dry out, or sowing them at the wrong depth. Many seeds fail simply because the grower didn't research the specific requirements for their species.* Damping-off Disease. - eeek! Your poor seedlings collapse at soil level overnight because they've lost the will to live. A bit of preventative maintenance can help avoid this fungal nightmare - use a good quality, sterile potting mix that drains well, keep some air moving around the trays, and don't overwater. This fungus thrives in wet, damp conditions, so try to keep things from getting too soggy.
Mold during Stratification. If you're using plastic bags to stratify your seeds, you'll likely end up with a moldy mess. Make sure to squeeze out excess water before sealing the bag tight, and every week or so, give the bag a bit of a "vent" by opening it up so some air can get in.
Pests and Wildlife. Let's face it - mice, squirrels, birds - they're all just waiting for the perfect moment to swoop in and destroy all your hard work. Protect your sowing with wire mesh, and if you're stratifying seeds in the fridge, keep them in a secure container so those critters can't get to them.
Environmental Stress. Late frosts, intense heat, and harsh winds can all be a real bane to new seedlings. Be prepared by hardening them off gradually, time your plantings for when the weather is kind, and if things do get a bit dodgy, throw some extra protection their way - like a cloche or some shade cloth.
Frequently Asked Questions About Starting Trees From Seed
These questions cover a few of the most common practical issues people have when trying to get started with seed-grown trees - including viability, supermarket seeds, stratification, timelines, and container growing.
How can I tell if my tree seeds are still worth investing time in before I start?
Here's a simple test: chuck 'em in a bowl of water and see what happens. Seeds that sink are probably good to go, while seeds that float (or even more alarmingly, actually seem to have a hollow inside) may not be worth bothering with. Old or poorly stored seeds can be a bit dodgy too, so be prepared to experiment. Many tree species are best sown within a couple of years of harvesting - this way you get the strongest results.
Can I grow supermarket fruit seeds like apples, avocados, or mango into productive trees?
Yeah, you can get supermarket fruit seeds to grow pretty easily if they're fresh - but don't expect to end up with particularly great fruit, or a tree that's exactly what you want. The genetic variation in supermarket fruit is a bit of a black box - and even if you do get some good fruit, it may not come at the right time of year. Unless you're really feeling adventurous, consider keeping these seeds for grafting or as a neat little houseplant.
Do I have to do cold stratification every time, or can I just chuck seeds straight in the ground?
Some species - like oaks and walnuts - are pretty happy to just be sown fresh in the ground in autumn. But for most tree species, you really do need to give them a bit of a cold, moist period to get them going. And if you live somewhere with mild winters, it's probably best to just use the fridge to get the stratification job done.
How long will it take for my tree to start producing fruit, or get to a size I can use?
Well, that's the thing - it really varies. Some species - like black locust - might be ready to go in just a few years. Most fruit trees started from seed will take 5-10 years or so to start producing fruit (while grafted trees will do it in 2-4 years because their scion wood is already a bit more mature). And if you're looking at using your tree for something other than fruit - like a windbreak, or a bit of wildlife habitat - you can plant these out pretty much as soon as they're sturdy enough - usually after a year or two of growing.
Is it better to keep seedlings in pots for a bit longer, or plant them out as soon as possible?
Keeping trees in pots for too long can be a bit of a problem - especially if they're growing fast. Plant them out when they're about 20 to 60 cm tall, and in a season when it's not too crazy - usually after a year or two of growing. If you can't get to the final planting site straight away, use some temporary nursery beds or a raised bed with deep, loose soil to keep them happy and healthy - don't leave them stuck in pots indefinitely!


