The Ultimate Guide on How to Start an Organic Garden Successfully
How to Start an Organic Garden
Quick Facts
Organic gardening means growing without synthetic chemicals, focusing on healthy soil, natural pest control and safe food for your family. It’s about creating a healthy environment by avoiding synthetic chemicals and using eco-friendly methods.
Your first steps this week: test your soil, pick a sunny spot with at least 6 hours of direct sunlight and start a small compost pile with kitchen scraps and dry leaves. You need to understand the basics of organic gardening if you’re a beginner.
Beginners start small—one 4x8 ft raised bed or 3–5 large containers—and plant easy crops like lettuce, radishes, herbs and green beans.
Good soil, watering at the base of the plants and mulch do more to prevent pests and disease than any spray ever could.
You can start an organic garden on a balcony, patio or backyard. Progress matters more than perfection and every season teaches you something new.
What is Organic Gardening
Organic gardening is simply growing food and flowers without synthetic fertilizers, pesticides or herbicides. Before you start, you need to understand the basics of organic gardening—these foundation concepts will help beginners create a successful and sustainable garden. Instead of reaching for chemical solutions, organic gardeners work with nature—building rich soil, encouraging beneficial insects and letting plants grow on their own terms.
The benefits are real and measurable. When you grow an organic vegetable garden you harvest safer food free of chemical residues. Many gardeners notice their tomatoes taste better, their lettuce crisper. Beyond your plate, organic gardening brings more bees and butterflies to your space, protects local streams from chemical runoff and builds soil that gets healthier year after year. Organic gardening also works to maintain a healthy environment by avoiding synthetic chemicals and using eco-friendly methods that support soil health and plant resilience.
How is this different from conventional gardening? In a regular garden you might use synthetic fertilizers for a quick fix and chemical sprays to kill weeds or pests. In an organic garden you feed the soil with compost and natural amendments and manage pests through balance not elimination. The results take a bit longer but they last. Organic gardening is defined as gardening based on the production practices in the National Organic Standard. Here’s the good news: anyone can start in 2026 with very basic tools. A hand trowel, a watering can or hose, some compost and a few packets of organic seeds are all you need. No fancy equipment required.

Step 1: Choose Your Garden Location
Before you buy a single seed or plant, site selection is key. The right spot sets you up for success; the wrong one leads to frustration.
Most fruiting plants—tomatoes, peppers, cucumbers, beans—need 6–8 hours of full sun each day. Leafy greens like lettuce, spinach and kale are more flexible and can produce well with 4–6 hours of sunlight. If your space gets less than 4 hours of direct sun you’ll want to focus on shade tolerant herbs and greens.
Here’s an easy way to find your best spot: on a clear day check your yard, balcony or patio three times—at 9 a.m., noon and 3 p.m. Note where the sun hits. The area with the most total sun exposure is your winner.
Pick a spot near a water source. Whether that’s an outdoor spigot, a rain barrel or easy indoor access for filling watering cans, convenient water makes the difference between a thriving garden and one you slowly neglect.
Avoid these trouble spots:
Low areas where water pools after rain (leads to root rot)
Ground near fences or lawn edges previously treated with herbicides to kill weeds
Under large trees with hungry roots that compete for nutrients and water
Options for small spaces: A container garden on a balcony works beautifully. Railing planters, large pots with drainage holes or a small raised bed along a sunny wall can all support a productive edible garden. You don’t need a big backyard to grow your own food.
Garden Design: Planning Your Organic Space
Designing your organic garden is where creativity meets practicality. A thoughtful layout not only makes your garden more productive but also easier to care for and more enjoyable to spend time in. Whether you’re working with a big backyard or a small patio a little planning goes a long way towards a thriving organic vegetable garden.Start with a simple sketch. Map out your available space, noting areas that get full sun, partial shade and where you’ll need access for watering and harvesting. Group vegetables, herbs and fruiting plants by their sunlight and water needs—this will help you care for them efficiently and make sure each plant gets what it needs to thrive.
Think about pathways and access. Leave enough space between beds or containers so you can reach every plant without stepping on your garden soil which can compact it and harm plant roots. Wide paths make it easier to move compost, mulch and tools around your organic garden.
Mix beauty with function. Incorporate flowers and herbs among your vegetables to attract beneficial insects and pollinators. Edible flowers like nasturtiums or calendula add colour and help with pest management, while herbs like basil and dill can boost the health of nearby crops.
Plan for succession and rotation. Design your garden so you can easily rotate crops each season which helps maintain soil fertility and reduces pest problems. Raised beds or defined plots make it simple to keep track of what grew where, supporting healthy organic gardening practices year after year.
Personalize your space. Add a seating area, trellises for climbing beans or cucumbers or a small herb garden near your kitchen door for easy access. Even a few containers arranged thoughtfully can create a productive and inviting organic garden.
By planning your garden layout with intention you’ll set yourself up for a bountiful harvest and a space you love to tend. Remember every organic garden is unique—design yours to fit your needs, your space and your dreams for fresh homegrown food.
Step 2: Get to Know and Improve Your Soil
Healthy soil equals healthy plants. This is the first line of defense against problems and organic gardening is all about feeding soil life—not just plants.
Soil is made of sand, silt and clay particles, plus organic matter, water and air. Good soil structure looks dark and crumbly, holds moisture without getting soggy and smells like fresh earth. Bad soil looks pale, compacts easily and drains either too fast or not at all.
Do a soil test before planting. You can pick up a home test kit from any garden centre or send a sample to your state lab. Results usually come back within 1–2 weeks and will tell you:
What the Test Shows
Why It Matters
pH levelMost vegetables prefer slightly acidic to neutral soil (6.0–7.0)
Nitrogen (N)
Helps leafy growth
Phosphorus (P)
Supports root crops and flowering
Potassium (K)
Builds overall plant health
The report will usually include simple recommendations for what to add.
To improve soil organically mix in finished compost, aged manure (never fresh—it can burn plant roots), or leaf mold. These add organic matter which improves soil fertility and helps soil hold both water and nutrients. Research shows that increasing organic matter from 2% to 4% can nearly double your soil’s water-holding capacity.
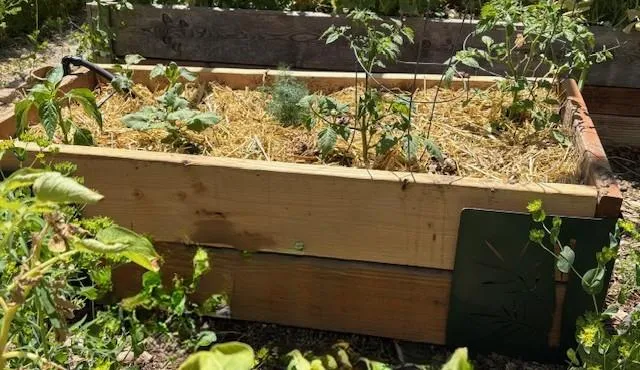
For very poor or compacted ground starting with a raised bed 8–12 inches deep is often easier. Fill it with a mix of topsoil and compost and you’ve created ideal growing conditions from day one.

Step 3: Start and Use Compost
Compost is the heart of organic gardening. It’s simply recycled plant and food scraps that break down into dark, crumbly material full of nutrients and beneficial microorganisms. Think of it as slow-release food for your garden soil.
Starting a compost pile is an important step that pays off for years. You can use a simple bin, a tumbler or even just a heap in a corner of your yard.
What to compost:
Fruit and vegetable peels
Coffee grounds and tea bags
Eggshells
Dry leaves and small twigs
Grass clippings (from lawns not treated with chemicals)
Shredded cardboard and newspaper
What to avoid:
Meat and dairy products
Oily or greasy foods
Pet waste
Diseased plants
Weeds that have gone to seed
Good compost needs a mix of “greens” (wet, nitrogen-rich material like kitchen scraps) and “browns” (dry, carbon-rich material like leaves). A good ratio is about 2–3 parts browns to 1 part greens. This balance helps microbes break everything down efficiently. Turn or mix the pile every week or two to add nitrogen through aeration.
In warm weather with regular turning a well-managed compost pile can produce usable compost in 2–4 months. A slower, low-effort pile may take 6–12 months—and that’s perfectly fine.Finished compost looks dark and crumbly, smells like fresh earth (not sour or rotten) and can be mixed into your garden beds or spread on top as mulch. It’s the best way to feed your soil naturally.
Step 4: Choose Organic Seeds and Plants
When shopping for your garden look for seeds and seedlings grown without synthetic chemicals. Organic seeds come from plants grown organically and are certified by agencies like USDA.
What to look for:
Packets labeled “Certified Organic”
Avoid seeds labeled as “treated” (coated with fungicides)
Check seed catalogs for organic sections
Most seeds sold in major catalogs are non GMO by law, but labels confirm this
For beginners start with quick, forgiving crops:
Easy Crops Days to Harvest
Radishes 25–30 days
Lettuce 30–45 days
Bush beans 50–60 days
Peas 60–70 days
Basil 30–40 days (first harvest)
Green onions 60–70 days
You can start from seed or buy organic seedlings from local nurseries. Transplants are especially helpful for tomatoes, peppers and some herbs which need a longer growing season to produce fruit.
When shopping for your garden look for seeds and seedlings grown without synthetic chemicals. Organic seeds come from plants grown organically and are certified by agencies like USDA.
Check your local frost dates. Plant cool-season crops like lettuce, peas and radishes in early spring or late summer for a fall harvest. Wait until after the last frost for warm-season crops like tomatoes, peppers and cucumbers.
Native or climate-adapted plants need less water and fewer pest interventions. They’re already suited to your region’s conditions making them great choices for new organic gardeners building their own garden.
Step 5: Planting and Watering the Organic Way
Careful planting and smart watering help plants grow strong and resist pests naturally. These gardening practices cost nothing extra but make a real difference.
Spacing matters. Follow the instructions on seed packets or plant tags. Crowded plants compete for nutrients, trap humid air and invite disease. Give each plant room for its roots to spread and air to flow around its leaves.
How to plant seeds:
Sow at a depth of about 2–3 times the seed’s thickness
Firm the soil gently over the seed
Keep the top layer evenly moist until you see sprouts
How to transplant seedlings:
Dig a hole as deep as the root ball
Ease the plant out of its pot
Loosen the roots gently if they’re circling
Set the plant at the same depth it was growing (plant tomatoes slightly deeper—they grow roots along buried stems)
Water well at the base
Water the soil, not the leaves. Wet foliage invites fungal disease. Early morning watering works best—it gives plants time to absorb moisture before the heat of the day and allows any splashed leaves to dry quickly.
Check moisture by sticking your finger 1–2 inches into the soil. If it feels dry at that depth, it’s time to water. Deep, less frequent watering encourages roots to grow down, making plants stronger and more drought-resistant. Shallow daily splashes keep roots near the surface where they stress easily.

Step 6: Mulch, Crop Rotation, and Garden Clean-Up
These three simple habits prevent many future problems. They take little time but deliver big returns.
Mulch is any organic material you spread over bare soil. Good options include:
Straw (not hay, which contains weed seeds)
Shredded dry leaves
Grass clippings from untreated lawns
Wood chips (for paths and around perennials)
Spread a 2–3 inch layer around your plants, but keep mulch a couple of inches away from stems to prevent rot. Mulch holds moisture, keeps soil cool in summer, suppresses weeds and breaks down slowly to feed your soil.
Crop rotation means avoiding planting the same plant family in the same spot year after year. This reduces pest management problems and soil-borne diseases. Research shows that rotation increases beneficial soil bacteria, which supports healthier crops.
A simple rotation for beginners:
Year Crops
1 Tomatoes, peppers, eggplant
2 Beans, peas
3 Carrots, beets, radishes
4 Lettuce, spinach, kale
Repeat cycle
End-of-season clean-up matters too. Remove dead plants, weeds with seeds and rotting fruit before winter. These harbor pests and diseases that overwinter in garden debris.
Don’t add clearly diseased plants or invasive weeds to your regular compost pile. Either discard them in the trash or hot-compost them at temperatures high enough to kill pathogens.
Step 7: Natural Pest and Disease Control
In organic gardening the goal is balance – not a bug free garden. Some pests are always present but healthy plants in healthy soil usually shrug them off.
Walk your garden several times a week. Look under leaves for eggs, check leaves and stems for holes and notice any spots or wilting. Early detection lets you handle problems before they spread.
Attract beneficial insects by planting flowers and herbs near your vegetables. Ladybugs, lacewings and parasitic wasps eat the bad bugs that damage crops. Good companion plants include:
Marigolds
Calendula
Dill
Fennel
Yarrow
Use physical barriers when needed:
Floating row covers protect young plants from insects
Cardboard collars around stems block cutworms
Netting keeps birds and rabbits away from your harvest
Hand-picking works well in small gardens. Drop slugs, cabbage worms and beetles into a container of soapy water.
If you need a spray choose certified organic products like insecticidal soap or neem oil. These target pests without leaving long lasting residues. Follow label directions carefully – even organic products can harm beneficial insects if misused.
Remember: strong, well watered plants in healthy soil are your best defense. Pesticides – even organic ones – are a last resort, not a first line of attack.

Step 8: Start Small and Grow Over Time
You don’t need a huge garden to begin. A few containers or one small bed is plenty for your first season.
Recommended starting size:
One 4x8 foot raised bed, or
3–5 large containers (at least 5 gallons each with good drainage)
Choose no more than 5–7 different crops your first growing season. This keeps things manageable while you learn. An avid gardener with years of experience might grow 20 varieties – but they started small too.
Keep a basic garden journal. Write down:
Planting dates
Seed varieties
Sunlight hours in your spot
Watering habits
What worked and what failed
This will become invaluable. Each season you’ll make better choices because you remember what happened before.
Here’s the truth about growing vegetables organically: the first year is learning. Your soil might need more work. Pests might get ahead of you. Some crops will fail. That’s normal. It’s part of the process. Each year gets better soil, more knowledge and bigger harvests. Organic gardening is a skill built season by season. The garden you tend next year will be easier than this year’s—and the produce you eat from your own organic food garden will taste like something store-bought never can.
FAQs
Do I need special tools to start an organic garden?
You only need a few basics: a hand trowel, a hand fork, a watering can or hose with a gentle spray, and gardening gloves. A simple rake and shovel help with ground beds but aren’t necessary for small container gardens. Over time you can add items like a wheelbarrow, pruning shears and a proper compost bin as your garden grows.
Can I grow an organic garden if I only have a balcony or patio?
Yes. A container garden on a balcony or patio can be fully organic. Use large pots with drainage holes, fill with organic potting mix and fertilize with compost or organic liquid feeds. Compact crops like salad greens, an herb garden, bush tomatoes, peppers and dwarf beans do well in small spaces with enough sunlight.
How long does it take to see results from organic gardening?
Some crops deliver fast results. Radishes and baby lettuce can be ready to eat in 3-4 weeks. Tomatoes, peppers and squash take 2-3 months or more. Soil improvement from compost and mulch builds year after year so gardens get easier and more productive over time. See your first season as a learning with both successes and lessons.
Is organic gardening more expensive than regular gardening?
Some organic products cost more at first—organic potting mix, certified seeds, natural fertilizers. But composting and saving seeds cut costs significantly over time. Starting small, reusing containers and focusing on soil health keeps costs manageable. Plus homegrown organic produce replaces grocery store items often pays for itself in fresh vegetables and fruit.
Can I still call my garden organic if my neighbors use chemicals?
Yes. For home gardeners “organic” means you choose not to use synthetic fertilizers and pesticides in your own growing area. Spray drift from neighbors is possible but practical steps help: talk kindly with neighbors about spray timing, plant a hedge or barrier and position beds a few feet from shared fences. Your gardening practices are what matter most.
