Essential Guide to Growing Herbs Indoors for Fresh Flavors Year-Round
Growing Herbs Indoors
There’s something quietly satisfying about snipping fresh basil from a sunny kitchen window in the middle of January. The snow outside, the warmth inside, and a little pot of green life right there on the sill—ready to brighten a weeknight pasta or a lazy weekend brunch. Growing herbs indoors has never been more accessible, even in the smallest city apartment, and 2026 is a wonderful year to start your own indoor herb garden.

Key Takeaways
Anyone can grow herbs indoors on a sunny windowsill, under simple LED grow lights, or in hanging wall planters—even in a small apartment with minimal space.
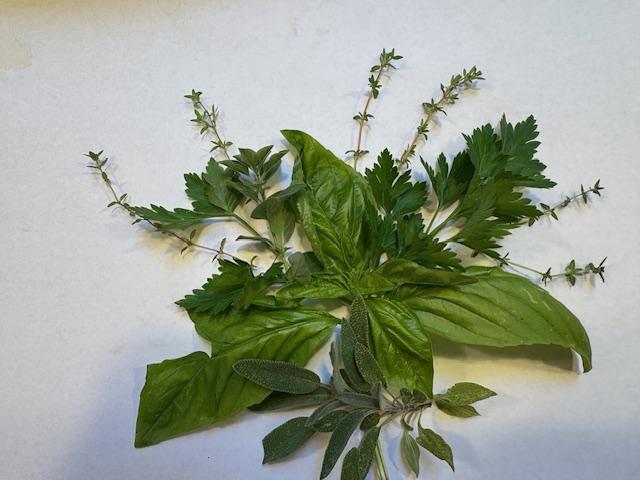
Start with 6–8 easy herbs: basil, mint, chives, parsley, thyme, oregano, rosemary, and cilantro. Some prefer moist soil (basil, mint, parsley), while others like it drier between waterings (thyme, oregano, rosemary).
Most herbs need at least 4–6 hours of bright light daily and pots with a drainage hole filled with quality indoor potting mix.
Regular light harvesting, careful watering, and occasional feeding every 3–4 weeks keeps plants bushy and productive year round.
You’ll find step-by-step setup instructions, troubleshooting tips, and an FAQ at the end for less obvious questions.
Why Grow Herbs Indoors?
Picture this: it’s a Wednesday evening, you’re making soup, and you realize you need parsley. Instead of grabbing your coat and heading to the store, you simply reach over to your windowsill. That’s the magic of an indoor herb garden—and it works beautifully even in the smallest spaces.
Convenience and flavor on demand. Fresh herbs transform weeknight dinners, weekend brunches, herbal teas, and even cocktails. No more last-minute grocery runs for a wilted bunch you’ll only use half of. Your favorite herbs are right there, ready when you are.
Year-round harvests regardless of climate. Whether you’re in Chicago, Toronto, or anywhere with snowy winters, outdoor balcony gardens typically shut down by October. Growing indoor herbs means the harvest never stops—fresh rosemary in December, cilantro in February.
Real cost savings over time. Those $2–$4 plastic packs of herbs at the grocery store add up quickly. A $5 transplant from the nursery can provide months of continuous harvests. The math works in your favor.
Aesthetic and wellness benefits. Greenery on a kitchen windowsill, a bright grow-light shelf in the living room, or a living wall of hanging planters adds calm and color to any room. Indoor plants have a way of making spaces feel more alive.
Educational value for all ages. Watching seeds sprout on a windowsill teaches children and beginners about light, water, and how plants grow. It’s a gentle introduction to growing your own food—and a reminder that even a small container can be productive.

Best Herbs for Indoor Growing
Some herbs are simply more forgiving indoors than others. Rather than planting dozens of varieties, start with a small mix of reliable performers. You’ll build confidence quickly—and have fresh herbs for cooking within weeks.
Basil is a fast grower perfect for pasta sauces, pesto, and pizza. Growing basil successfully means keeping the soil consistently moist (not soggy) and providing at least six hours of bright light on a warm windowsill or under a grow light. Basil plants thrive in warmth and reward you with aromatic leaves all season.
Mint (peppermint or spearmint) is wonderful for teas, mojitos, and desserts. This herb is vigorous—almost too vigorous. Always grow mint in its own pot; otherwise, the roots will take over everything. Lemon balm, a close relative, behaves similarly and deserves its own container.
Chives offer a mild onion flavor ideal for eggs, baked potatoes, and salads. They’re compact and grow indoors with minimal need for attention, making them perfect for narrow kitchen windowsills or small hanging pots.
Parsley (flat-leaf and curly) grows more slowly but steadily, serving as a kitchen workhorse for soups, grain bowls, and garnishes. It tolerates partial shade better than basil but still needs bright conditions to stay productive.
Thyme and oregano are woody Mediterranean culinary herbs that prefer brighter, drier conditions. Let the soil dry slightly between waterings. These herbs grow indoors beautifully on a south facing window and pair wonderfully with roasted vegetables, chicken, and pizza.
Rosemary is aromatic and slightly more demanding. It wants strong light, good air circulation, and to dry out a bit between waterings. A larger pot—8 to 10 inches—suits rosemary as it matures, and it does well in a tall wall planter or on a spacious windowsill.
Cilantro grows quickly but has a tendency to bolt (go to seed) when stressed. Sow herb seeds in small batches every 3–4 weeks for a continuous supply. It’s essential for salsas, curries, and fresh summer rolls.
A word of caution: Avoid very large or deep-rooted herbs like full-size dill, fennel, or horseradish as first projects. They outgrow indoor containers quickly and need more light than most apartments can provide.
Herb
Light Needs
Watering Preference
Best Use
Basil
Full sun, 6+ hours
Consistent moisture
Pesto, pasta, pizza
Mint
Partial sun to full sun
Moist soil
Teas, cocktails, desserts
Chives
Partial shade to full sun
Moderate moisture
Eggs, potatoes, salads
Parsley
Partial shade to bright light
Moderate moisture
Soups, grains, garnish
Thyme
Full sun
Dry between waterings
Roasted vegetables, meats
Oregano
Full sun
Dry between waterings
Pizza, Mediterranean dishes
Rosemary
Direct sunlight, 6+ hours
Dry between waterings
Roasted meats, breads
Cilantro
Bright light
Consistent moisture
Salsas, curries
Planning Your Indoor Herb Garden Space
Your layout depends on two things: how much light you have and how much space you can dedicate. A single kitchen window, a grow-light shelf in a spare corner, or a wall of hanging planters—each approach works, and you can combine them as your garden grows.
Windowsill gardens. A south facing window or west-facing window ledge in the kitchen is ideal. Place several 4–6 inch pots in a narrow waterproof tray to catch drips and keep things tidy. This is the simplest way to start your own indoor herb garden—no special equipment needed beyond pots, soil, and seeds or transplants.
Grow-light shelves. When natural light isn’t enough light, a simple metal shelving unit with clip-on or bar-style full-spectrum LED grow lights transforms any wall or corner into a mini indoor garden. This setup works year round, regardless of what’s happening outdoors.
Hanging planters on a wall. Mounting a row or grid of small wall planters, pocket planters, or hanging rails in a bright room maximizes vertical space. Keep saucers or liners in place to protect walls from moisture. Trailing herbs like thyme or oregano look especially beautiful cascading down.
Countertop or table planters. A long rectangular planter box on a dining table or console near a sunny window offers a centerpiece that’s both decorative and functional. Place herbs that need more space at the edges.
Light and air considerations. Avoid drafty windows in winter months, hot radiators, and spots directly over heat vents—herbs hate extreme temperature swings. Some air circulation reduces mold risk, but don’t chill your plants with direct blasts.
Aesthetic tip. Group herbs with similar water needs together. Arrange taller plants like rosemary at the back and low, mounding herbs like thyme at the front for a neat, layered look.

Step-by-Step: Setting Up Your Indoor Herb Garden
Let’s walk through the process from containers to soil, light to water. Think of this as your clear how-to sequence—follow it once, and you’ll have the rhythm for every herb you plant.
Step 1 – Choose containers
Select 4–6 inch pots with a drainage hole in the bottom. Ceramic or plastic both work well. Match each pot with a saucer to catch excess water. Larger herbs like rosemary may need 8–10 inch pots as they mature.
Step 2 – Add the right potting mix
Use a lightweight indoor potting mix labeled for houseplants or herbs—not garden soil from outdoors. Adding a bit of perlite improves drainage for herbs that prefer drier roots.
Step 3 – Planting from starts or seeds
For nursery transplants, gently loosen the roots, set the plant at the same depth it was growing, and firm the soil around it. For herb seeds, sow shallowly in moist mix and keep warm until sprouting. Seeds take longer but cost less.
Step 4 – Position for light
Place herbs on a sunny location like a south-facing windowsill, or under full-spectrum LED grow lights on a shelf. In winter months, aim for 12–14 hours of artificial light daily to compensate for shorter days. Most herbs need at least six hours of bright light.
Step 5 – Water correctly
Water when the top 1–2 cm (about half an inch) of soil feels dry. Soak thoroughly until water drains into the saucer, then discard excess after 15 minutes. Herbs sitting in water develop root rot quickly.
Step 6 – Lightly fertilize
Apply a diluted organic fertilizer formulated for edibles once every 3–4 weeks during active growth. Skip feeding in very low light periods so plants don’t stretch and grow leggy.
Step 7 – Rotate and tidy
Turn pots a quarter-turn weekly for even growth toward the light. Trim dead leaves promptly and wipe dust off leaves and grow-light fixtures to keep everything healthy and neat.
Choosing and Using Grow Lights
In many apartments, windows simply don’t get four to six hours of direct sunlight—especially from November to February. That’s where grow lights become essential for growing indoor herbs.
Type of light. Choose full-spectrum LED grow lights in the 4000–6500K range (often labeled “daylight”). They’re compact, energy-efficient, and generate minimal heat. Additional lighting makes all the difference in low-light spaces.
Distance. Keep lights roughly 6–12 inches above herb tops. Adjust higher for stronger fixtures to avoid leaf scorch, and lower when plants start stretching toward the light.
Duration. Run lights for 12–14 hours per day. Inexpensive plug-in timers handle this automatically—no need to remember to flip the switch. This simulates a sunny location even in windowless rooms.
Placement with décor. Clip lights to shelves, mount slim bars under cabinets above a kitchen counter herb row, or install wall-mounted fixtures above hanging planters. Indoor growing can look intentional and attractive.
Setting Up Windowsill and Wall Planters
Two of the most efficient places to grow herbs indoors are narrow windowsills and hanging wall planters. Here are some specific suggestions to make your growing system more successful.
Windowsill layout. Place 3–5 small pots in a long waterproof tray. Group thirstier herbs (basil, parsley, mint) together and drier herbs (thyme, oregano, rosemary) separately. A window that catches morning or afternoon sun works well.
Safety and stability. Check that pots are stable on the sill. Use railings or brackets if the sill is shallow. Keep pots away from curious pets or children who might knock them over.
Wall hanging systems. Use a sturdy rail with hooks, wall-mounted shelves, or fabric pocket planters secured into studs or with proper anchors. Moist soil is heavy—the last thing you want is a collapsed planter.
Drip management. Choose planters with built-in liners or discreet saucers. A washable backsplash or easily cleaned surface below hanging planters saves walls from water stains.

Daily and Weekly Care for Indoor Herbs
Consistent small tasks—checking soil, pruning, adjusting lights—are far more effective than irregular bursts of attention followed by neglect. You don’t need a green thumb; you just need a routine.
Daily quick check
Glance at your plants once a day. Feel the soil on at least one pot. Look for drooping, dry tips, or tiny pests on leaf undersides. Catching problems early makes them simple to fix.
Watering rhythm
Some herbs need water every 2–3 days (basil, mint, parsley), while other herbs go 4–7 days between waterings (rosemary, thyme, oregano). Room temperature, pot size, and how much light plants receive all affect this schedule.
Rotating plants
Turn pots weekly so they don’t lean dramatically toward the window or grow lights. As sun angles change through the seasons, you may need to rearrange your setup.
Pruning and pinching
Pinch basil tips just above a leaf node and trim mint regularly to encourage bushy, compact growth. Leggy stems mean the plant is reaching for light—address the cause as you prune.
Cleaning and airflow
Wipe window glass and grow-light covers to maximize light transmission. A small fan on low nearby (not blasting directly at plants) reduces mold, discourages fungus gnats, and strengthens stems. Herbs benefit from gentle air circulation.
Harvesting Indoor Herbs the Right Way
Here’s the wonderful secret: harvesting correctly actually makes most herbs fuller and more productive over time. The more you snip, the more they grow—within reason.
General rule. Never remove more than about one-third of a plant at once. This allows the herb to recover and keep producing leaves rather than struggling to survive.
Leafy herbs (basil, mint, cilantro). Cut just above a pair of leaves or a leaf node on a stem. This encourages two new shoots to form where you made the cut, filling out the plant beautifully.
Clumping herbs (chives, parsley). Snip outer leaves or stalks first, close to the base, leaving the inner growth to continue developing. This keeps the center productive.
Woody herbs (rosemary, thyme, oregano, sage). Trim soft green growth rather than very old, woody stems. Avoid stripping an entire branch bare—leave some foliage for the plant to photosynthesize.
Storage. Use fresh herbs immediately when possible. Otherwise, store rinsed, dried sprigs wrapped in a slightly damp towel in the refrigerator for a few days. Fresh always tastes best.

Common Indoor Herb Problems and Simple Fixes
Troubleshooting Common Problems
Most issues come down to three things: light, water, or pests. The good news? Small corrections usually bring herbs back within a week or two.
Problem
Likely Cause
Simple Fix
Leggy, stretched plants
Insufficient light
Move closer to a sunny window, remove sheer curtains during the day, or add a grow light
Yellowing leaves, soggy soil
Overwatering or poor drainage
Check for blocked drainage holes, use lighter potting mix, allow more drying time
Dry, crispy tips
Underwatering or dry air
Water more thoroughly, group plants together, use a humidity tray for moisture-lovers
Mold or algae on soil
Constantly wet surfaces, still air
Scrape off top layer, water less often, improve airflow, ensure pots drain completely
Aphids or fungus gnats
Indoor conditions favor pests
Rinse leaves, use yellow sticky traps, let soil dry more, try mild insecticidal soap
A note on pests: always rinse herbs before eating, especially after any treatment. Prevention—good drainage, proper watering, some airflow—beats treatment every time.
Growing Forward
Growing plants indoors is less about perfection and more about showing up each day with a quick glance, a small sip of water when needed, and the occasional snip for dinner. You don’t need much space—just a sunny window, a few pots, and the willingness to learn as you go.
Start with one herb. Maybe basil for that pesto you love, or chives because they’re practically indestructible. Watch how it responds to your care. Adjust. Add another. Before long, you’ll have a small indoor garden that makes your kitchen feel warmer, your cooking taste fresher, and your winter months a little more green.
The plants will teach you what they need. Your job is simply to pay attention—and to enjoy the harvest.
Frequently Asked Questions
Can I grow herbs indoors without any natural sunlight?
Yes, it’s entirely possible to plant herbs in a room with no usable windows. Full-spectrum LED grow lights running for 12–14 hours daily can replace sun completely. Compact systems like small hydroponic countertop units or shelf setups with bar lights work well in windowless kitchens or basements. Just monitor water and nutrients closely since you won’t have natural cues from outdoor weather.
What happens to my indoor herbs when I go on vacation?
Water thoroughly just before leaving and move plants slightly farther from the brightest window to reduce stress and water loss. For trips of about a week, self-watering pots, capillary mats, or placing pots in a shallow tray lined with wet pebbles and water can help. For longer absences, ask a friend or neighbor to water lightly once or twice. Most herbs are resilient enough to handle a brief dry spell.
Are any indoor herbs unsafe for pets?
While many culinary herbs like basil, thyme, and sage are generally low-risk, some common herbs, including chives and other alliums, can be toxic to cats and dogs if eaten in significant quantities. Place all herb pots where pets can’t easily chew them. If you have curious cats, consider growing cat-friendly plants, such as catnip, in a separate location. Always confirm safety with a trusted veterinary resource.
Can I move my indoor herbs outside in summer and bring them back in for winter?
Many herbs adapt well to seasonal moves outdoors. The key is gradual acclimation: place them outside for just a couple of hours a day in bright shade, then slowly increase sun exposure and time over 7–10 days. Before bringing plants back inside in early spring or autumn, check carefully for pests. Rinse foliage or repot if needed to avoid introducing bugs to your other indoor plants.
Do hydroponic herb kits work as well as soil for indoor growing?
Modern hydroponic countertop systems can grow herbs very successfully under built-in LED lights—often faster than soil, since roots receive consistent water and nutrients. Systems like compact countertop growers function as both appliances and décor. They require regular refills of water and nutrient solution, plus occasional cleaning. Many gardeners combine one hydroponic kit with traditional soil pots to replace pods as needed and enjoy the best of both approaches.
