Essential Guide to Indoor Composting:
Indoor Composting: How to Turn Kitchen Scraps into Plant-Ready Gold (Even in a Small Apartment)
Key Takeaways
Indoor composting lets apartment dwellers transform everyday kitchen scraps, paper, and other materials into nutrient-rich compost for houseplants and balcony containers, with minimal smell when done correctly.
The main indoor methods include sealed bokashi-style buckets, worm bins (vermicomposting), and small aerated bins—vermicomposting is usually the most practical and low-odor option for long-term apartment use.
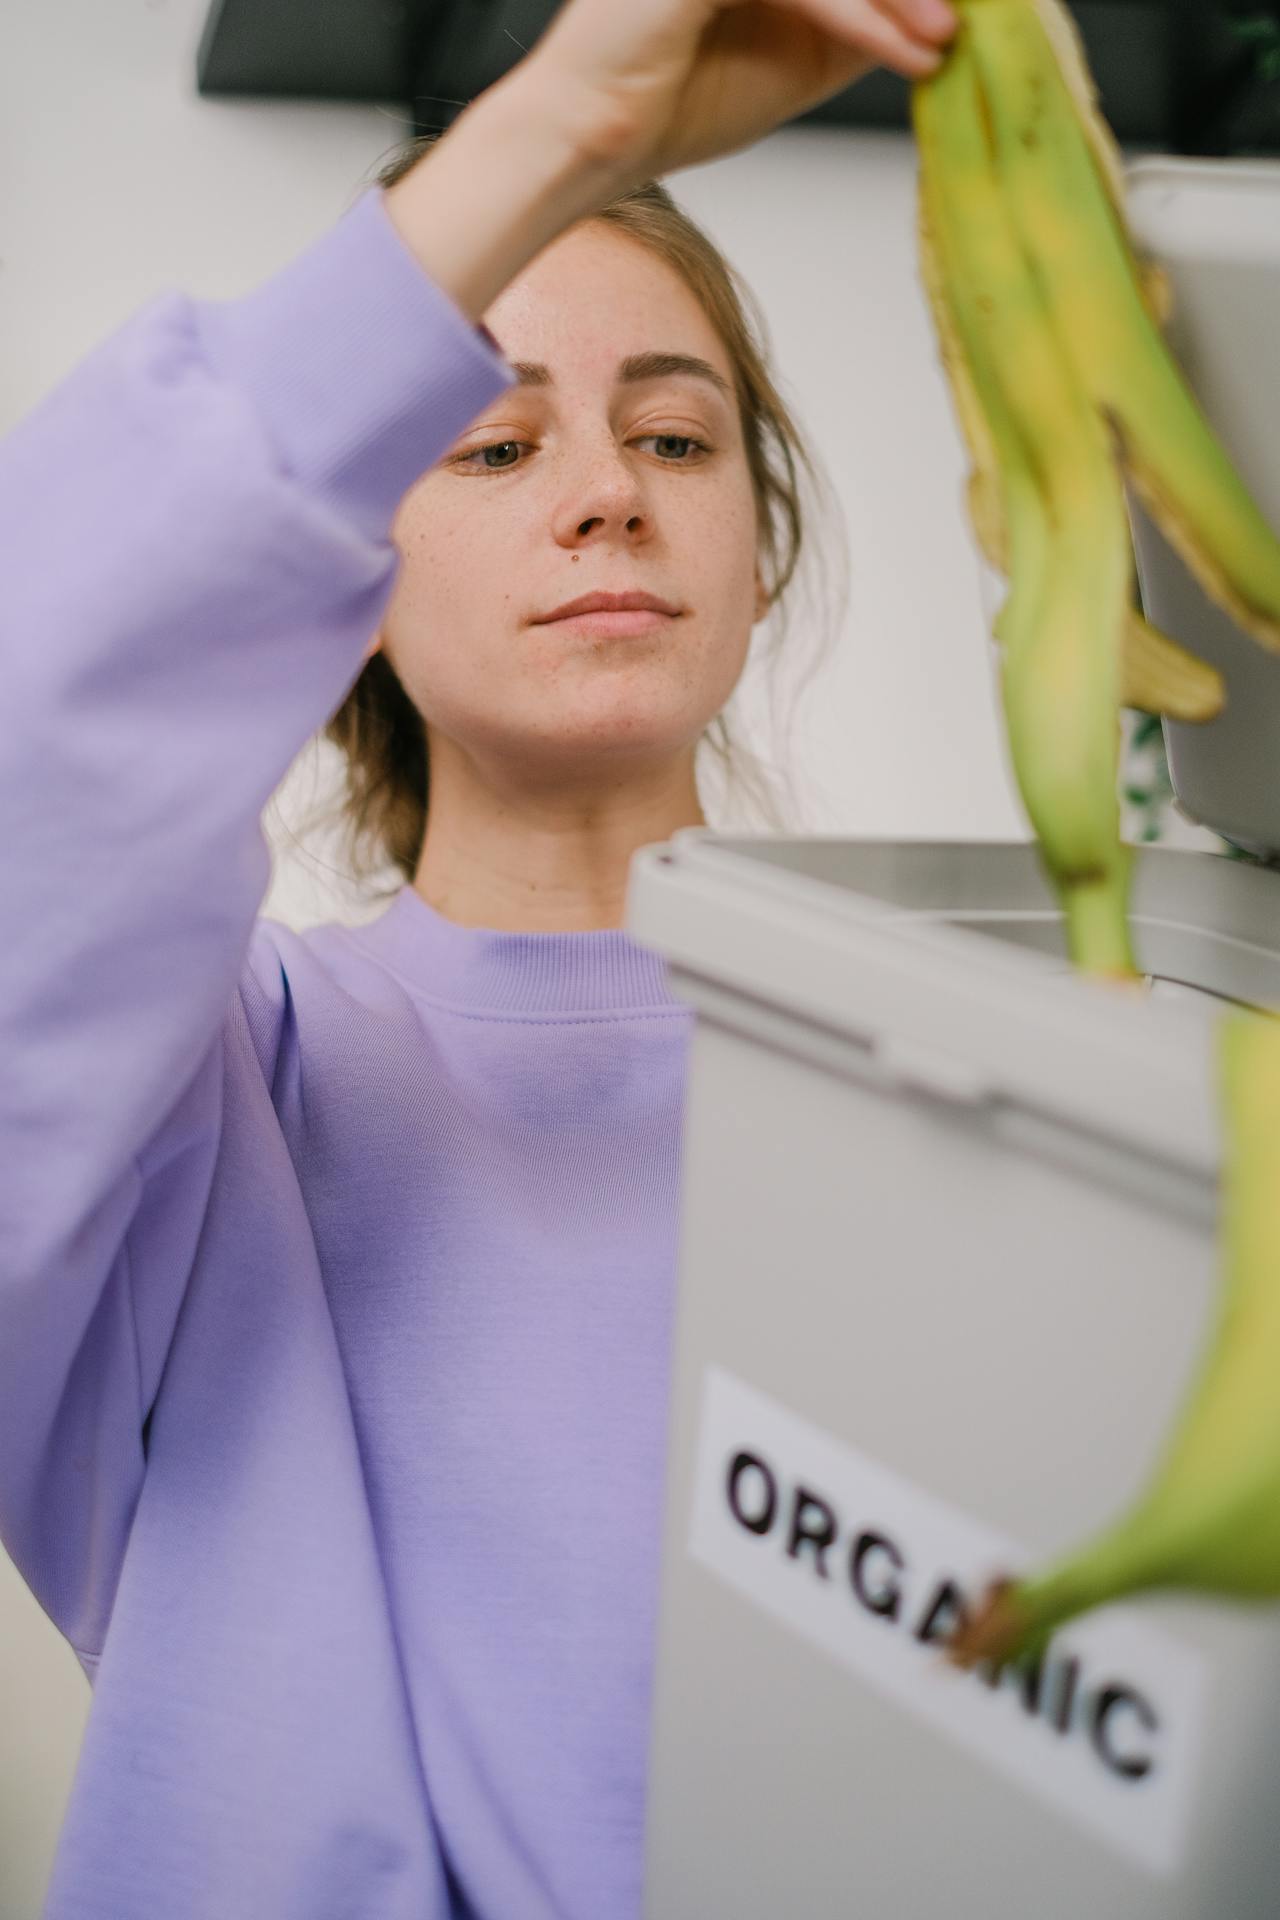
Stick to the basic rules: compost fruit and vegetable scraps, coffee grounds, eggshells, and shredded paper; avoid meat, dairy, oily foods, and anything already rotting to keep your bin odorless.
Finished compost can be used as a thin topdressing on existing potted plants or mixed at roughly 1 part compost to 3–4 parts bagged potting soil for a richer growing mix.
With a tight fitting lid, proper moisture balance, and enough dry “browns,” indoor composting does not need to smell, attract flies, or take up more than a small corner of your kitchen or closet.
Introduction: Indoor Composting for Apartments and Small Spaces
Picture this: a cozy one-bedroom apartment in the city, morning light filtering through the window, a few potted plants on the sill, and a small balcony just big enough for a chair and a tomato plant. You finish your coffee, peel a banana, and scrape the last of last night’s salad into the trash. It all goes into a plastic bag, then down the chute, then off to a landfill somewhere you’ll never see.
It’s a familiar routine. And if you’ve ever felt a twinge of guilt watching those vegetable peels disappear into the trash, you’re not alone. Americans send roughly 40 million tons of food waste to landfills each year, and apartment kitchens contribute a significant share. But here’s the thing—those banana peels, apple cores, and wilted lettuce leaves don’t have to end up as garbage. They can become something genuinely useful, right in your own home.
Indoor composting means creating compost entirely inside your living space, using compact containers instead of outdoor piles or tumblers. It’s a simple, tidy way to turn organic waste into plant food without needing a yard. The main indoor options include small aerated bins, bokashi-style fermentation buckets, and worm bins—also called vermicomposting. This article will walk you through each method step by step, with special emphasis on vermicomposting, which tends to be the most flexible and apartment-friendly choice.
Whether you’re growing herbs on a windowsill, keeping a collection of houseplants happy, or tending tomatoes on a balcony, indoor compost is perfect for your container garden. And if you’ve never composted before? No worries. The tone here is practical and beginner-friendly—no jargon, no judgment, just clear guidance you can actually use.
Indoor Composting Basics: How It Works in a Closed Space
Outdoor compost heaps work on a grand scale—big piles that heat up, break down quickly, and handle large volumes of yard waste like grass clippings and leaves. Indoor systems are different. They’re small, controlled, often cooler, and much tidier. Think of them as miniature ecosystems contained in a bin under your sink or in a closet corner.
Here’s how the composting process works in a nutshell:
Microorganisms (bacteria, fungi, and sometimes worms) break down organic material into humus-like compost.
These tiny helpers need three things: air circulation, moisture, and a balanced diet of organic waste.
The process is slower indoors than in a hot outdoor pile, but it’s also cleaner and easier to manage in a small home.
Over weeks or months, food scraps and paper transform into dark, earthy-smelling compost ready for your plants.
The key to success indoors is understanding “greens” and “browns.” Greens are nitrogen rich materials—wet, fresh stuff like fruit and vegetable scraps, coffee grounds, and tea bags. Browns are carbon-rich dry materials like shredded paper, cardboard, and dead leaves from your houseplants. Outdoors, a slightly off balance isn’t a big deal. Indoors, getting the ratio right matters more because an imbalanced bin can develop a bad odor or attract flies.
Most indoor setups use a lidded container—a countertop caddy for collecting scraps, a bin under the sink for active composting, or a dedicated composter tucked in a corner. The goal is keeping everything clean and contained. Imagine a cross-section of a small bin with alternating layers of scraps and paper, a few air holes drilled in the sides, and maybe a tray underneath to catch any liquid. That’s your basic indoor compost system.
What You Can and Can’t Compost Indoors
Choosing the right inputs is the single biggest factor in keeping indoor compost odorless and pest-free. Get this right, and your bin will hum along quietly. Get it wrong, and you’ll quickly understand why some people think composting smells terrible. It doesn’t have to.
Yes: Good for Indoor Compost
You can happily add vegetable peels of all kinds—potato skins, carrot tops, onion ends (in moderation). Apple cores, banana peels, melon rinds, and other fruit scraps work beautifully. Coffee grounds and paper filters are excellent, as are plain tea bags without plastic mesh. Crushed eggshells add calcium and help balance acidity. Stale bread in small amounts is fine, as are wilted salad greens and the sad vegetables that got forgotten in the back of the fridge—as long as they’re not already rotting food.
For your browns, think plain paper towels (unbleached is best), shredded newspaper with black-and-white ink, thin cardboard from cereal boxes and egg cartons, and dead leaves from houseplants. These carbon-rich materials absorb moisture, provide structure, and help prevent that sour smell nobody wants in their apartment.
No: Avoid Indoors
Some things have no place in an indoor bin. Meat, fish, and bones attract pests and create strong odors as they decompose. Dairy products like cheese, yogurt, and milk go rancid and smell awful. Large amounts of oil or greasy foods can coat organic matter and slow decomposition while producing unpleasant smells. Heavily spiced or salty leftovers, baked goods in excess, and pet waste should all stay out.
Avoid glossy or plastic-coated paper, magazines with unknown inks, diseased plant material, and anything that’s already moldy or rotting. The goal is to feed your bin fresh scraps, not to bury a mistake that’s already gone bad.
A note on citrus, onions, and garlic: these are fine in small amounts for most indoor systems. However, if you’re doing worm composting, limit them to less than about 20% of your food scraps. The acidity and strong compounds can irritate worms if overused. Most indoor apartment compost setups work best when focused on simple kitchen produce scraps and paper—not complicated cooked leftovers.
Choosing an Indoor Compost Method for Your Apartment
Three main approaches work well for apartments, each with its own strengths:
Aerated Kitchen Bin: A simple container with air holes where microbes break down scraps and paper over time—no worms required.
Vermicomposting (Worm Bin): Red wiggler worms live in bedding and eat your scraps, producing rich worm castings perfect for plants.
Bokashi-Style Fermentation: An anaerobic system using a sealed bucket and special bran to ferment scraps, including meat and dairy.
Which method fits your life? If you have a tiny studio with only a kitchen counter to spare, a small bokashi bucket might be your best bet. If you generate a lot of scraps and want hands-off processing, worm composting handles volume well once established. If you’re a plant lover with many pots hungry for nutrients, the concentrated vermicompost is like gold for your garden. And if you have a small balcony, any of these methods can work outdoors in mild weather.
Here’s how they compare:
Space needed: Aerated bins take 1–2 square feet, worm bins about the same, bokashi buckets fit on a counter
Start-up cost: DIY bins cost $10–30, commercial worm bins $50–100, bokashi kits $30–60
Maintenance level: Aerated bins need weekly stirring, worm bins need feeding attention, bokashi requires draining liquid every few days
Smell potential: All methods are low-odor when managed correctly; bokashi has a mild pickle scent
Foods handled: Aerated and worm bins avoid meat/dairy; bokashi can handle almost everything
The rest of this article provides practical, step-by-step instructions for each method, starting with the most flexible option for apartments: vermicomposting.
Vermicomposting Indoors: Apartment-Friendly Worm Composting
Vermicomposting uses red wiggler worms—scientific name Eisenia fetida—to turn kitchen scraps and paper into dark, crumbly compost called vermicast or worm castings. If the idea of keeping worms in your apartment sounds strange, consider this: a well-managed worm bin is nearly odorless, about the size of a small storage tote, and can live quietly under a sink, in a closet, or on a balcony.
Red wigglers are composting champions. They can consume up to half their body weight in organic matter daily, and they thrive at temperatures between roughly 59°F and 77°F (15°C–25°C)—typical indoor conditions. The finished vermicompost is especially concentrated and gentle, making it ideal as a thin topdressing on existing plants or mixed in small percentages with bagged potting soil.
What follows is a detailed walkthrough of setting up your worm bin, feeding your worms, maintaining a healthy environment, and harvesting that beautiful finished compost for your houseplants.

Setting Up an Indoor Worm Bin
Getting started with worm composting is simpler than you might think. Here’s how to set up your bin from scratch.
Choose a container: a dark plastic tote or purpose-built worm bin of around 10–20 gallons (38–75 L) works well. The darkness keeps worms comfortable since they avoid light. Make sure the bin has a tight fitting lid to retain moisture and keep curious pets out. Drill small air holes in the sides and near the top for ventilation—worms need air circulation to stay healthy.
Place your bin on a tray or shallow container to catch any liquid that might drain out, protecting your apartment floors. You can also elevate the bin on small blocks or jar lids to improve airflow underneath.
For bedding, tear or shred plain cardboard and paper into smaller pieces. Add a few handfuls of finished compost or garden soil if you have some available—this introduces beneficial microbes to kickstart the process. Then moisten the bedding until it feels like a wrung-out sponge: damp but not dripping wet. Fill the bin about half full with this fluffy bedding material.
Now for the stars of the show: order red wigglers from a local supplier or reputable online seller. Most small households can start with about one pound (roughly 450 grams) of worms. That’s approximately 1,000 worms—more than enough to handle a typical apartment’s kitchen scraps.
Introduce the worms gently. Place them on top of the moistened bedding and leave the lid off for a few minutes. The light will encourage them to burrow down into the bedding. Once they’ve started to disappear, close the bin and let them settle for a day before you add any food. They need time to adjust to their new environment.
Feeding Your Worms the Right Way
New bins should be fed lightly for the first couple of weeks. Think of this as the adjustment period—your worms are settling in, and you’re learning to read their appetite. Overfeeding too soon is a common mistake that leads to odors.
Set up a small countertop caddy with a lid to collect food scraps between feedings. Focus on fruit and vegetable peels, coffee grounds, used paper filters, crushed eggshells, and small pieces of plain bread. Chop larger items into smaller pieces—this speeds up decomposition and makes life easier for your worms.
When it’s time to feed, move some bedding aside to create a shallow trench in one corner of the bin. Add a modest layer of food scraps—about a cup or two to start. Cover the food completely with bedding or fresh shredded paper, then replace the lid. This burial step is crucial for odor control and keeping flies away.
A pound of worms will eventually process roughly 0.25–0.5 pounds (110–225 grams) of scraps per day. But as a beginner, start at about half that rate and only increase when most of the previous feeding has disappeared. If you check and see lots of uneaten food, slow down.
Rotate your feeding spots around the bin—left side one time, right side the next, then the center. This encourages even use of the space and prevents localized rot pockets that can develop a smell. Think of it like rotating crops in a garden, except you’re rotating where you bury the scraps.

Keeping Your Indoor Worm Bin Odorless and Healthy
A healthy worm bin smells like clean, damp earth—not like garbage. If you notice an unpleasant odor, something’s off, and it’s almost always fixable.
Moisture is key. The bedding should always feel like a wrung-out sponge. If it’s dripping wet, add more shredded paper or cardboard and leave the lid slightly ajar for a day to let excess moisture escape. If it seems too dry, mist with water from a spray bottle. Finding the right balance takes a little practice, but once you get it, maintenance becomes routine.
Cover fresh food with a layer of dry bedding each time you feed. This simple step traps odors, deters fruit flies, and keeps the bin surface tidy. It’s the single most effective odor control tactic you have.
Watch for warning signs: a strong sour or rotten smell, clouds of flies, or visible mold covering the surface. If any of these appear, pause feeding for a week or two, add more browns, and gently fluff the bedding to improve air circulation. The bin usually recovers quickly.
Temperature matters in apartments. Keep your bin away from radiators, heaters, and sunny windows—worms prefer stable conditions around room temperature. And don’t put your bin on an unheated balcony in winter if temperatures drop below freezing. Cold worms slow down dramatically, and a hard freeze can kill your colony.
One last note: you might occasionally see tiny white springtails or other small soil creatures in your bin. Don’t panic. These are usually harmless helpers in the decomposition process, not pests. As long as the bin looks and smells normal, they’re fine company for your worms.
Harvesting and Using Finished Vermicompost Indoors
After about 3–6 months, depending on how much you feed and your indoor temperatures, much of the original bedding will have transformed into dark, crumbly, earthy-smelling vermicompost. You’ll notice fewer visible bits of paper and more material that looks like rich, fine soil.
The “light method” works well for harvesting in a small apartment. Spread a portion of the bin contents on a tray or plastic sheet under a bright light. Worms hate light and will burrow down to escape it. Wait 10–15 minutes, then gently scrape off the top layer of finished compost. Repeat the process—letting worms migrate deeper, then removing more compost—until you’re left mostly with worms that can return to the bin with fresh bedding.
An alternative is the “migration method.” Push all the older material to one side of the bin, then add fresh bedding and food to the empty side. Over the next few weeks, worms will migrate toward the new food source, allowing you to harvest finished vermicompost from the older side without disturbing them much.
Before using your vermicompost, pick out any large undecomposed chunks—avocado pits, woody stems, big eggshell pieces—and return them to the bin. You can optionally sieve the compost through a simple mesh screen for a finer, more uniform product that’s easier to work with on houseplants.
Here’s how to use your harvest indoors: apply a 0.5–1 inch (1–2.5 cm) layer as a topdressing on existing potted plants a few times per year. The nutrients will work their way down to the roots with regular watering. Or mix roughly 1 part vermicompost with 3–4 parts bagged potting soil to create a richer mix for repotting or starting new containers.
Vermicompost is potent—no need to use it alone. Mixing it with standard potting mix prevents drainage issues and makes the material easier to handle indoors. Your plants will thank you.

Simple Aerated Indoor Compost Bins (Without Worms)
Not everyone wants worms in their apartment, and that’s completely fine. A simple aerated indoor bin offers a low-tech alternative using microbes alone to break down your scraps.
An aerated indoor bin is essentially a compact version of a backyard pile: a container with holes, layers of greens and browns, and occasional mixing to keep oxygen flowing. It’s slower than vermicomposting but requires no live animals to care for.
Choose a lidded container of about 3–8 gallons (12–30 L). Drill air holes in the sides—small enough to keep flies out but large enough to allow some air circulation. Place a tray underneath to catch any liquid, and you can store the whole setup in a kitchen corner, under a table, or in a closet.
The basic routine looks like this: line the bottom with dry browns (shredded paper, cardboard). Add thin layers of chopped food scraps, then immediately cover each layer with more shredded paper or cardboard. The layer of browns should always be thicker than the visible food layer. Once a week or so, stir or fluff the contents with a small hand trowel to introduce air.
Unlike outdoor piles, indoor aerated bins should stay small and carefully managed. Once the bin is about three-quarters full, stop adding new material for a few weeks and let the contents finish breaking down. This “curing” period allows microbes to complete their work before you harvest.
Odor control is critical here: keep browns plentiful, avoid wet or heavy additions, watch moisture levels, and never add meat, dairy, or oily leftovers. This method works best for households that produce modest amounts of produce scraps and want a simple, worm-free approach.
Bokashi-Style Indoor Composting Buckets
Bokashi is an anaerobic fermentation method—different from the oxygen-loving processes we’ve discussed so far. Instead of breaking down food with air-breathing microbes or worms, bokashi pickles scraps in a sealed environment using special bran inoculated with beneficial microorganisms.
One major advantage for apartments: bokashi systems can handle meat, dairy, and even small bones—materials that would cause serious problems in other indoor methods. This makes bokashi suitable for households with varied food waste who want to divert everything possible from the trash.
A bokashi system uses a sturdy, sealable pail with a tight lid, an internal strainer plate that keeps solids above the liquid, and a spigot at the bottom for draining. The liquid that collects—sometimes called compost tea or bokashi tea—can be diluted and used as a liquid fertilizer for established plants.
Here’s the basic process: place scraps in the bucket in layers, sprinkle bokashi bran over each layer, and press down to remove air pockets. Keep the lid closed tightly between additions. Every few days, drain the liquid from the spigot.
After the bucket is full, let it sit sealed for about 2 weeks to complete fermentation. The contents won’t look like finished compost yet—they’ll be pickled, somewhat intact, and may have a mild sweet or tangy smell (like pickles, appropriately). This fermented material needs a secondary stage to become true compost: mix it with soil in containers, bury it in a large planter, or add it to a worm bin or aerated system to finish breaking down over several more weeks.
When managed correctly, bokashi systems should not smell rotten or foul. Follow the manufacturer’s instructions for how much bran to use and how often to drain liquid. The environment inside should remain anaerobic—meaning air-tight—so a good seal on the lid is essential.
Keeping Indoor Compost Odorless and Pest-Free
Let’s be honest: the fear of smell and bugs is what stops most apartment dwellers from trying indoor composting. But with a few simple practices, you can keep your bin clean, quiet, and completely unnoticeable to anyone who doesn’t know it’s there.
The core rules apply across all methods:
Always cover fresh scraps with dry material (browns)
Maintain good balance—roughly 2–3 parts browns to 1 part greens by volume
Avoid problem foods like meat and dairy (except in bokashi)
Manage moisture carefully—damp, not soggy
Here’s how to troubleshoot common issues:
Sour or ammonia smell: Your bin is too wet or has too many greens. Add more shredded paper, stir to introduce air, and pause feeding until the smell dissipates.
Fruit flies appearing: Food is exposed at the surface. Bury all scraps under a layer of bedding. You can also freeze scraps before adding them to kill any fly eggs, and make sure your bin has a secure lid without gaps.
Visible mold on top: Small amounts of white mold are normal and harmless. Large patches of green or black mold suggest the bin is too wet or food is sitting too long. Add browns, improve air circulation, and reduce feeding.
Liquid pooling at the bottom: Drain it off, add absorbent material like shredded cardboard, and check if your food scraps are too wet before going in.
For prevention, keep lids on at all times except when feeding. Consider placing fine mesh over air holes if you’re seeing tiny gnats. Avoid positioning your bin right next to open fruit bowls on the counter—flies can find their way from one food source to another. Occasionally wipe down the exterior of your bin to keep the area tidy.
A small dedicated countertop caddy with a snug lid and compostable paper liners can help keep your kitchen counter clean while scraps accumulate between bin feedings. Empty it into your main bin every few days, and you’ll rarely have odor issues.
Using Indoor Compost with Houseplants and Container Gardens
Here’s where all your patience pays off. That dark, crumbly material you’ve created isn’t just garden soil—it’s concentrated plant food, full of beneficial microbes and gentle nutrients that help support healthy plant growth over time.
Homemade compost improves moisture retention by 20–30%, meaning your pots won’t dry out as quickly between waterings. It adds organic matter that improves soil structure, helping roots breathe and grow. And it provides a slow, steady release of nutrients without the risk of burning plants like synthetic fertilizers sometimes can.
Using compost as a topdressing: For plants already growing happily in their pots, gently remove any decorative stones or bark mulch from the surface. Spread a thin layer of compost—about 0.5–1 inch (1–2.5 cm)—across the soil surface, keeping it away from direct contact with stems. Water normally, and nutrients will work their way down into the root zone over time.
Mixing compost with bagged soil: When repotting or starting new containers, blend your compost with commercial potting mix. A good general ratio is 1 part compost to 3–4 parts potting soil. Use a clean bucket or tub to mix thoroughly before filling your containers. This creates a richer growing medium without overwhelming drainage.
A word about drainage: avoid using 100% compost in pots, especially indoors. Pure compost can become too dense and hold excessive moisture, suffocating roots. Mixing with a light potting soil and adding perlite maintains healthy air around roots and prevents problems.
Timing suggestions: topdress houseplants once or twice a year—early spring and midsummer work well for most plants. Use your compost-enriched soil mix whenever you’re repotting or starting new containers throughout the growing season.
If you’re new to using homemade compost, test it on a few sturdy, non-finicky plants first—pothos, spider plants, or philodendrons are forgiving. Make sure there are no issues with over-application before treating your most prized specimens.

FAQ: Indoor Composting in Apartments
These questions address common concerns that come up for first-time indoor composters, especially those living in apartments or shared buildings.
How long does indoor composting take before I can use it on my plants?
Timing depends on your method. Vermicomposting indoors usually produces usable finished compost in about 3–6 months. Aerated bins without worms can take 4–8 months. Bokashi buckets ferment in roughly 2 weeks, but the fermented material still needs several additional weeks mixed with soil or another composting system to fully break down into something plant-ready.
Smaller, chopped scraps decompose faster. Steady but moderate feeding keeps things moving without overloading the system. Stable indoor temperatures around normal room temperature help too—composting slows down significantly in cold conditions.
Will my landlord or neighbors notice that I’m composting indoors?
A well-managed indoor compost system is compact, contained, and nearly odorless. It generally goes unnoticed in shared buildings as long as there are no leaks or smells in hallways. Most bins fit easily under a sink, in a pantry, or on a balcony corner—discreet locations that don’t draw attention.
That said, check your building’s rules about keeping containers of organic material. Follow guidelines about liquids and waste disposal, and be a good neighbor by maintaining your bin properly. A clean, quiet system raises no concerns.
Is indoor composting safe around pets and young children?
Indoor composting is generally safe when bins have secure lids and are placed out of reach. Dogs, in particular, may be attracted to food smells if lids are left open or containers aren’t sturdy. Use bins with latches or weights on top, store them in low-traffic areas like closets or under-sink cabinets, and keep curious pets away during feeding time.
Basic hygiene applies: wash hands after handling compost, particularly before cooking or handling food. Don’t let young children play with bin contents unsupervised, and teach them that the compost bin isn’t a toy. Common sense goes a long way.
Can I compost in winter if my apartment gets cool or I only have an unheated balcony?
Vermicomposting needs temperatures roughly above 50°F (10°C). If your apartment stays warm, your worm bin will do fine all winter. But don’t leave it on an unheated balcony where it could freeze—that would kill your worms. Keep the bin inside your living space or in a heated area during cold months.
Aerated bins and sealed bokashi buckets tolerate wider temperature swings, but decomposition slows significantly when it’s cold. Expect slower progress in winter, and don’t worry if your bin seems sluggish. Things will speed up again when temperatures rise.
What should I do if I produce more food scraps than my indoor bin can handle?
Several options can help. Start by reducing food waste where you can—meal planning, proper storage, and using up produce before it goes bad all help. If you’re still overflowing, consider adding a second bin, which is especially practical with worm composting since you can split your colony.
You might also share surplus scraps with a neighbor who composts, connect with a local community garden that accepts organic waste, or use a municipal food-scrap drop-off program if your city offers one. Overloading a single indoor bin is a common cause of odor and pest problems, so it’s better to scale your system or find supplementary outlets than to overfeed a small apartment setup.
Indoor composting isn’t about perfection—it’s about participation. Start with whatever method feels manageable, learn as you go, and don’t be afraid to make a mistake or two. Your plants will benefit, your trash will shrink, and you’ll discover a quiet satisfaction in turning everyday scraps into something genuinely useful. Ready to give it a try? Choose your bin, collect your first batch of scraps, and let the transformation begin.
